Monday, December 31, 2012

Mission Organization


This is what I have been up to the last few days... Undertaking "Mission Organization" in "my room".  I am cataloging all of my wood-mount stamps and wheels so I can flip through to find images or sentiments without pulling out each set to see what it's got.  I started with a binder for my clear mount stamp sets and that is "current" and up to date.  And thick :)  I am almost done with my "wood mount" binder.   I am just finishing up the pages for the Jumbo Wheels then I will tackle my Standard Wheels - then I will be DONE!  It will be so much easier to maintain going forward!  It's very exciting to enter a new stamp set in it's binder :)  I have actually found creating my Wood Mount binder to be exciting - when not being tedious and daunting ;)  It's as though all of my "oldies but goodies" are new again!  I am actually going to start making some projects with these sets and spotlighting them here.  We all have older sets that don't feel loved anymore... poor things.  I plan to change all of that in the new year!

So, Happy New Year friends.  
I am so happy to be facing the new year a little more organized and with a plan!  
There's exciting stuff ahead!

See you Next Year!
Mary

Thursday, December 27, 2012

New Items Added to the Clearance Rack


Who doesn't love a bargain???
I know I do!

So, it is with much excitement that I can tell you that Stampin' Up has added new items to the Clearance Rack!  Bargains galore can be found there and in every category!  Ribbon, Cardstock, Designer Papers, Punches, Sizzix Dies, Embossing Folders, Ink... you name it!
Don't miss out!  Items tend to disappear at a blink of an eye and I have lost out on more occasions than I care to remember!  If you want it, buy it!  It just may not be there if you wait so much as an hour!  Sleep on it and it's sure to be gone.  Just ask me, I'd know :(

Just click right over to my online store and enter the bargain hunters paradise called
The Clearance Rack

Happy Bargain Shopping :)
Mary


Getting a head-start on next year!


Happy Holidays and a Very Happy New Year!

The last few weeks have been soooo busy for us - as I am sure they have been for you!
In thinking about what I want my next year to look like, the first thing I wanted was to be less chaotic and more prepared for those things that I know will be here before I know it - like Christmas!
So, after all of my Christmas cards were mailed - at the last minute and a few short - I started making my cards for next Christmas!  After all, it will be here before I know it and I don't want to be caught unprepared - again!

So, in the coming days, I will be posting my creations and I hope they inspire you to get a head start as well!  I have a quite a few new stamp sets to play with as well and I am looking forward to inking them up and creating with them!  New Years eve is coming and I'm working on my "resolutions" list.  This aught to be interesting :)

Thanks for stopping by and I hope you'll come back for daily doses of inspiration starting soon!
Mary

Tuesday, December 4, 2012

Exciting News from Stampin' Up!


GET THE ORNAMENTAL ELEGANCE KIT--WHILE SUPPLIES LAST!

December 3, 2012
The ornament on the cover of our holiday catalog is such a hit that we are making it available as a kit--just in time to deck the halls with terrific trimmings you've made yourself! 

We've simplified this fun project so that you can quickly and easily achieve the same results. In addition to the kit, all you need is a glue gun, scissors, and adhesive. (Our Anywhere Glue Sticks [104045] are perfect for assembly.) 

Want greeting or place cards to go with those ornaments? The Ornament Keepsakes Stamp Set (W 128048 C 128051) gives you perfect coordination. Fancy a little sparkle and shine? Sprinkle on our Dazzling Diamonds Stampin' Glitter (102023)!

Each Ornamental Elegance Kit contains enough materials to create 10 heirloom ornaments--or stunning tags to attach to a special gift.

The Ornamental Elegance Kit (132832) is $14.95 and includes:
  • Die-Cut Cardstock Elements
  • Cherry Cobbler 3-1/2" Scalloped Tulle Ribbon
  • Natural Linen Thread
  • Vintage Faceted Designer Buttons 
  • Large Pearl Basic Jewels
Order these now so you will have plenty of time to make them for Christmas gifting--or for your family tree! Available while supplies last.

This kit is available in my online store or can be ordered direct by contacting me in person.

I'm so excited about this kit!!!!!  I can't wait for mine to arrive!!!

Wednesday, November 28, 2012


Online Extravaganza 2012
Hello Friends,
We are facing the final hours of our Online Extravaganza!  
These special discounts will end at midnight tonight!
FYI, some items are running low and may end up back-ordered. 
However, you will not see these reduced prices in the near future so if there is something you want, grab it now!
With Stamp Sets, Punches, Designer Paper, Gift Boxes, and even Ribbon to choose from, there is something for everyone!
If you have any questions at all, please give me a call!!!  
I'm here to help!
Happy Shopping!   
-Mary

Monday, November 19, 2012

Thanks A Bunch Catalog CASE


I made this card as a Thank You for a Workshop I have coming up.  
I wanted to highlight some of the fabulous products we have in our Holiday Catalog 
while thanking my Hostess for holding her workshop.  
I hope she likes it as much as I do!

This card is featured on page 30 of our Holiday Catalog.  
I hope I did the original artist's creation justice!  

The card base is Island Indigo.  In the original card, they used the Netting background stamp (AC pg 127 122655 $17.95) and stamped it in Island Indigo for a tone-on-tone look.  However, I am sorry to say that I do not own this stamp - Yet!  Grin! - so I had to use a retired background stamp - ouch!  The designer papers are from the Orchard Harvest Designer Series Paper Pack (Holiday Catalog pg 28 126895 $10.95).  I cut the striped piece 1 1/2" by 4 1/2" and used a square punch to flag the end.  I then took a coordinating pattern from the same DP pack and cut a 4 1/2" strip with the 
Dotted Scallop Ribbon Border Punch (AC pg 183 119275 $15.95).  
I cut that strip in half and attached half to each side of my striped piece with snail adhesive.  

The original card was a landscape card but, because my flagged piece ended up a little too short, 
it was at this point that I changed mine.  I thought it looked better this way.  

The image panel starts with a piece of Lucky Limeade cardstock cut with a die from the Window Frames Collection Framelits Dies (Holiday Catalog pg 30 129021 $26.95).  I then used a die the next size down to cut my inked image.   I chose the "Thanks a Bunch" image from Friendship Preserves (Holiday Catalog pg 30 W: 127910 $21.95 C: 127913 $16.95).  I colored the stamp with Early Espresso, Lucky Limeade and Island Indigo markers - exactly as the original artist did.  
I then ran a length of looped Early Espresso 1/8" Taffeta Ribbon (AC pg 172 119959 $5.95/10yds) 
under the cut out stamped image and attached it with snail adhesive.  
I then "popped this up" onto my Lucky Limeade piece with Dimensionals.  
Then that stack was attached to the card front with more Dimensionals.  

I loved this card when I first saw it in the Holiday Catalog and it's just as pretty in person!
I hope you have enjoyed this card and are inspired to CASE it yourself!
Thanks for stopping by today,
Mary 

Gingerbread Cheer


Here's a little Gingerbread Man delivering some Christmas Cheer.  
This card is another contender for my upcoming Card Class.  
You can't help but smile looking at this little guy!

My card base is Real Red cardstock.  I added a layer of Whisper White embossed with the Fancy Fan Embossing Folder (AC pg 189 127751 $7.95).  I then created a panel using Real Red cardstock with a panel of Whisper White cut 1/4" smaller.  I stamped my Gingerbread Man from Scentsational Season (Holiday Catalog pg 16 W: 121026 $18.95 C: 121190 $14.95)  in Early Espresso and the Candy Cane (from the same set) with Real Red onto Whisper White.  I then cut them out with the coordinating Holiday Collection Framelits Dies (Holiday Catalog pg 16 127814 $24.95) with my 
Big Shot.   If you love them as much as I do, make sure to purchase the bundle for a 15% savings!!!!  This bundle is a must-have for the holidays!!!! 
(Holiday Catalog pg 16 W: 129945 $36.95 C: 129946 $32.95)

I glued the Candy Cane onto my panel with Snail Adhesive and the Gingerbread Man is on a Dimensional.  I tied a length of Real Red Stitched Grosgrain Ribbon (AC pg 173 126875 $4.95/10yds) around the panel and tied a knot.  Below that, I stamped my greeting 
-from More Merry Messages (AC pg 15 W: 126400 $32.95 C: 126402 $24.95) - in Real Red 
using my Stampamajig (AC pg 7 101049 $11.95) for perfect alignment!  
The panel is adhered to the card front with Dimensionals.

And there you have it!  Bright and Cheery and a grin on a Gingerbread Man 
that just makes you smile back :)

I hope he brought a smile to your face today!
Thanks for stopping by and, if you have any questions about my projects, please don't hesitate to ask!
Mary

BTW: Our Online Extravaganza kicked off today!!!!  If you like the greeting I used on todays card, the More Merry Messages stamp set I used just so happens to be 25% off during this sale!  
This is an incredible set for the Holidays and an incredible buy at 25% off!  
Visit my online store and get yours before this incredible offer ends on November 28th!  
And, don't forget, the Big Shot Die Cutting Machine is a Doorbuster Deal today only!!!! 
Purchase your Big Shot today and save 20% off the regular price!!! 
 I can't imagine my life without my Big Shot :)

Merry Christmas Class Card


This is a card I came up with preparing for an upcoming class.   
I need something simple, yet elegant, that won't take very long for a large group to complete.  
This card just might fit the bill!

I zipped a Cherry Cobbler card base through the BigShot with the Fancy Fan embossing folder 
(AC pg 189 127751 $7.95).  I then cut a strip of Gumball Green and a strip of Whisper White 
1/4" narrower and layered them on the front.  I then cut a strip of Be of Good Cheer Designer Paper (AC pg 164 126896 $10.95) into 1 1/4" squares and used my Corner Rounder ( AC pg 183 119871 $6.95) on opposite corners and mounted them on the strips.  I then stamped an image from my 
Easy Events stamp set (AC pg 34 W: 116958 $32.95 C: 123225 $$24.95) in black Stazon 
(AC pg 157 101406 $7.95) on Whisper White and colored it in with my Cherry Cobbler and Old Olive markers.  I then punched it out with my 1 3/8" Circle Punch (AC pg 184 119860 $15.95) and mounted it on a piece of Gumball Green cardstock punched with the Designer Label Punch 
(AC pg 182 120907 $16.95).  This was added to the card front with Dimensionals.   

Very simple but I really like the result!  I hope you do too!
Thanks for stopping by and, if you have any questions about my cards, don't hesitate to ask!
Mary


Get Well Wishes


LOVE,LOVE,LOVE this card!

I was "surfing the 'net" yesterday and stumbled across a version of this card and just had to make it!  It's a "leaves" thing with me - I could do "Fall" themes all year 'round!  I am so excited about this card and I hope this photo does it a little bit of justice!  If this is your card that I'm CASE'ing, please let me know so I can give credit where credit is due!

I started with a base of Early Espresso, which I'm almost out of!!! Horrors!!!  then I added a layer of More Mustard, followed by a layer of our new Core'Dinations cardstock in Early Espresso (Holiday Catalog 127848 $6.95 12 sheets of 12x12).  That top layer was zipped through the Big Shot with the Woodgrain Embossing Folder (Holiday Catalog 127821 $7.95) and sanded with the 
Stampin' Sanding System (Holiday Catalog 129367 $3.95) to reveal the inside layer.  

My sentiment is from Perfectly Penned stamp set (Annual Catalog pg 132 W: 122890 $16.95 C: 122892 $12.95) stamped on Very Vanilla with Early Espresso Classic Ink.  The layers behind it are More Mustard and Old Olive cut with a shape from the Apothecary Accents Framelits (AC pg 191 127003 $24.95).  I cut one of each color, cut the More Mustard piece in half the long way and layered the pieces under the Old Olive piece.  An Antique Brass Brad (AC pg 174 Metallic Brads 119741 $6.95) balances out each side.  The whole sentiment panel is attached to the card with Dimensionals.

For my leaf cluster, I cut the leaf shapes with the Autumn Accents Bigz Die (Holiday Catalog pg 33 127812 $21.95) with Very Vanilla cardstock.  I then inked up my stamps from the coordinating  Wonderfall stamp set (Holiday Catalog pg 33 W: 128084 $24.95 C: 128087 $17.95) and stamped my designs onto my leaves.  The colors I used were: More Mustard, Old Olive, Cajun Craze, Early Espresso and Crumb Cake.   Some of my leaves are attached to the card with Snail Adhesive and others are on Dimensionals.  I then wrapped hemp twine (non-SU ) around the card panel and tied a bow.  I then added a brown button I had laying around to the top.   The whole panel was then added to card base.  For the inside of the card (not shown), I cut a panel of Very Vanilla and sponged the edges with Early Espresso.  I then stamped a row of leaves along the bottom.

Thanks for stopping by today!  I hope you enjoyed today's project!
If you have any questions about the techniques I used here today, please don't hesitate to ask!

I will also take this opportunity to say Happy Birthday to my dear Hubby!  
We are not together today but I'm with him in my heart.
I will see him on Wednesday :)

Have a great day!
Mary

BTW: Today is the first day of our Online Extravaganza!!!  
The Bigshot (used a lot on this card!) is a Today-Only Doorbuster Deal and is on sale for 20% off!!!!  
Regularly $99.95, you can buy it today only! for only $79.96!  
The super cute and incredible awesome Big Shot Doctor's Bag is also a Doorbuster today!!!  Regularly $69.95, you can purchase it today for only $55.96!  
The other Doorbuster Deal of the day is the Simply Scored Diagonal Plate for $9.56 
(also a 20% savings).  
For a complete list of all of the Online Extravaganza Savings, 
visit my website or send me an email.  Happy Shoppping!!!! -Mary


Friday, November 16, 2012

Online Extravaganza Announced!!!!


Stampin' Up has announced a very special Online Extravaganza 
taking place November 19th - 28th in my Online Store!!!!  
Woooo Hooo!  
I'm rubbing my hands together in glee and making my list of goodies to buy come November 19th!!!  
If you have any questions, don't hesitate to contact me and I will be happy to assist you!!!!

Warm Up with a Smile


Here is a super fun card that is sure to warm the hearts of your family and friends this Holiday Season!

I just love this Gingerbread Man (or Woman depending on how you stamp them ) 
and his bright, smiling face!  Here he is with 2 steaming cups of hot cocoa 
ready to warm the hearts of the recipient of this card :)  

The steaming cups of cocoa and the gingerbread man were stamped using images from our new Scentsational Season Stamp Set from the Holiday Catalog (pg 16 W: 121026 $18.95 C: 121190 $14.95) then cut out with the coordinating Holiday Collection Framelit Dies ( 127814 $24.95).  Stampin' Up is even bundling these two items together and offering them to us at a 15% savings over buying them separately!  How sweet is that?!  Just make sure you enter the Bundle Item Numbers to receive your discount!  Wood Mount set with Framelit Dies: 129945 $36.95 or Clear Mount Set with Framelit Dies: 129946 $32.95.

The backdrop for my images was cut using my new Window Frames Collection Framelit Dies from the Holiday Catalog.  They can be found on page 30 (129021 $26.95).  They even have a special coordinating Festive Paper-Piercing Pack if I want to step up my panels a notch and pierce the edges (I will be posting a card, on which I used the piercing templates, soon).  You will see this fun pack on pg 30 of the Holiday Catalog  (127857 $7.95).  It also coordinates with the Holiday Ornaments Bundle (Holiday Catalog pg3) and the Labels Collection Framelits Dies (pg 191 of the Annual Catalog) as well  making it a must-have!!!  

I hope my smiling Gingerbread Man and his steaming cups of cocoa brought a smile to your face 
and warmed your heart!

Thanks for stopping by today,
Mary

Thursday, November 15, 2012

Merry & Bright Gift Card Holder


This super bright and sparkly gift card holder was a project at my most recent Cards and 3D class.  I just love it!  It is a super easy project to make but makes such a huge impact!

I started by selecting two coordinating cardstocks from the 2011-2013 In Color Collection:
 Lucky Limeade (122926 $6.95 24sheets) and Island Indigo (122923 $6.95 24sheets).  
Next was selecting my stamp sets : 
Snowflake Soiree (Holiday Catalog W: 127922 $29.95 C: 127925 $21.95) 
and Merry and Type ( W 122550 $25.95 C: 122552 $18.95).  

I inked up the two smallest Snowflake stamps and stamped them in the coordinating ink in a random pattern on my cardstock.  I then used my coordinating In Color Markers ( 123002 $14.95 set of 5 colors) to color on my Sentiment stamp before stamping on Whisper White Cardstock (100730 $8.50 40 sheets).  I punched out my sentiment with the Decorative Label Punch ( 120907 $16.95).  I tied a length of Whisper White Organza Ribbon ( 114319 $5.95 15yds) around the cover sleeve and popped up my sentiment over it with Dimensionals.  My Silver Glimmer Paper ( 124005 $4.95 sheets ea. 12x12) snowflakes  were cut with the Snow Flurry Bigz Die (Holiday Catalog 127813 $21.95) and layered together with a Silver Brad (119741 $6.95 120 ct assorted Metallics) and popped up on a Dimensional.  

I love this little Gift Card holder and I hope you do too!

Thanks for stopping by today,
Mary

Saturday, November 10, 2012

Canned Thank You


Here's a little Thank You card I whipped up with the new Perfectly Preserved stamp set (Holiday Catalog W: 126690 $28.95 C: 126692 $20.95) and coordinating Framelits Dies (127822 $24.95).

Stampin' Up has bundled these two together and gives us 15% off when we purchase them together!  I love that!!!  The Wood Mount Bundle (129943) is $44.95 and the Clear Mount (129944) is $38.95.  I find myself purchasing all of my stamp sets in Clear Mount these days.  I love being able to look through my clear block and be able see my stamp image exactly as it will stamp on the paper :)

The card base is my go-to color these days - Crumb Cake!  I embossed the top panel with the Perfect Polka Dots Embossing Folder (117335 $7.95).  The Designer Paper piece is from the Orchard Harvest Designer Paper collection ( Holiday Catalog 126895 $10.95).  I layered it on a piece of Raspberry Ripple before adding it to my panel.  The ribbon is our Raspberry Ripple Stitched Satin Ribbon (can't tell you how much I love this ribbon - so supple!) (126845 $8.95).   The "Thank You" is stamped in Early Espresso (to coordinate with the panel under the cannery panel) from the Made for You stamp set.


I love,love,love this stamp set!

I hope you have enjoyed this card!

Thanks for stopping by today,
Mary


Friday, November 9, 2012

A "Mary" by Mary


This card was originally created by the super talented Mary Fish.  I fell in love with her card the second I saw it.  As is usually the case, I did not have some of the major elements she used on-hand (read that as I didn't have the Designer paper - grin) so I was forced to come up with my own version.  The design is hers but the color scheme and papers are all mine.

I used the Floral Frames Framelits ( 127012 $26.95) to create the body of my card in my new Favorite Color!  Raspberry Ripple.  Using the next size down frame, I cut out flowers in 2 coordinating Designer Papers from the Orchard Harvest collection.  I cut a small flower shape from the Floral Frames Framelits in Raspberry Ripple to mount my greeting on.  "Especially for You" is from the Made for You stamp set.  I love this set of 3 stamps (W: 126340 $11.95 C: 126342 $8.95).   The leaves were cut with the Blossom Petals Builder Punch ( 121808 $16.95).   The flagging is Whisper White with 3 of our Gold Brads (119741 $6.95 assorted metallics).

I hope you enjoy my version as much as I did Mary's.

Thanks for stopping by today!
Mary

Thursday, November 8, 2012

A little Sparkle to brighten up the Holidays


A little bit of bling goes a long way (grin)!  
This card was featured in our Demonstrator magazine, Stampin' Success.  
I wanted to make it the second I saw it!   
But, alas, I didn't have the Snow Flurry Bigz Die ( 127813 $21.95) to make it.  
What's a girl to do?  Order it of course!  
I got right to making it the day my die arrived!  I love it!  
I don't think this photo does it justice.  It's so pretty and sparkly in person.
  
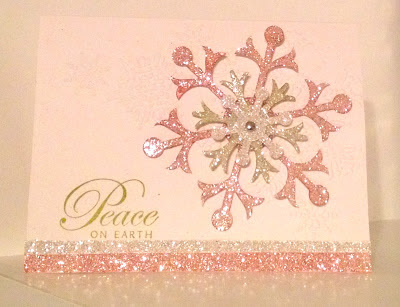
I used Naturals White cardstock and ran it through big shot with the Northern Flurry Embossing Folder (120902 $7.95).  The Snowflakes were cut out in Silver Glimmer Paper (124005 $4.95 pkg of 2 sheets) and colored using re-inker and sponges daubers.  How pretty!  
I layered my snowflakes together with a silver brad, popped them up on the card with Dimensionals, added my Sentiment and a couple of strips of Glimmer Paper and I was done!  
I hope you can see a little of the beauty of this card.  

Thanks for Stopping by today,
Mary

Halloween Purses for the Girlies!


I made the cutest (if I may say so myself) purses for my girls for Halloween this year.  
They are simply adorable!!!  
I absolutely love this purse!  You can make them for just about any occasion and I know that I will be making a lot more of these in the future!  With three Granddaughters, they will have boatloads of them - after all, a girl can not have too many purses, can she?  Hee Hee :)
These particular purses were made with some retired Halloween designer paper from last year's Stampin Up collection.  I used Basic Black for the edges and tabs with Black Satin Ribbon for the handles which I attached with Silver Brads.  The stamped message is from a current Stampin Up Halloween stamp set: Wicked Cool. 
These purses are the perfect size for a gift card, a chapstick, a little bauble or, in this case, I little bit of candy.  My girls are getting a little package of M&Ms in theirs :)

Thanks for stopping by today.  Happy Stamping!
Mary


Friday, October 12, 2012

One last share before I go...


It's almost time to say Goodbye to Massachusetts and Hello, Again to South Carolina!

All of my "stuff" has been boxed up and loaded into the trailer.  I am so sorry that I have not managed to post any projects lately.  I have been having some issues with iPhoto - it deleted almost 100 photos on me and I lost photos of some projects I wanted to post.  Unfortunately, the projects are packed away and it just was not possible to re-photograph again.  Once I am settled in SC, I can fix that :)

So, I leave you with this little "tease" shot of a card I made.   I plan to teach this card at my first events in South Carolina!  I'm very excited!  It's a great card and I made two of them - this Missing You card and one with a different sentiment.  Stay tuned for the full reveal once I am settled in!  

In the meantime,Thanks,as always, for stopping by and I hope you have a fantastic weekend!!
Mary

Friday, October 5, 2012

It's almost that time of year again...


The leaves here in New England are starting to change color and that means it is time for me to pack up our things and prepare for our transition to South Carolina!   Every year I am amazed by how much I have accumulated that needs to make the trip with us!   I may need to pick up a few more packing boxes this year :)
  
As always, I procrastinate packing up my "stamping stuff".  I can't play with it once it's packed so I put it off as long as I can!  I can't wait to see how much my collection has grown once all of my beloved stamps etc are together under one roof!   I've only just begun to sort everything out and "stage" it but I can already tell, I'm gonna need more boxes!  The guest room bed is serving as my sorting table :)


Well, now I step away from the packing for the weekend.  We are camping on Cape Cod with the family this weekend and it's almost time to head out!  Next week I hope to post some of my latest projects for you!  In the meantime, Have a fabulous weekend!

Thanks for stopping by,
Mary 


Wednesday, October 3, 2012

For the First Time Ever....


Stampin' Up is offering select Single Stamps from some of our popular sets!!!!
Awesome!
View the complete offering here in my online store.

Tuesday, October 2, 2012

Merry Christmas from Stampin' Up!


This is a Fantastic offer from Stampin' Up, available only during the month of October!  For more information, and to order your bundle with FREE Paper Piercing Pack, click  Here  to visit my website and online store!  If you have any questions at all, don't hesitate to give me a call or send me an email!   I had purchased the Ornament Keepsakes Bundle in August and I just ordered the Paper Piercing Pack last week - it should arrive tomorrow!!!  I hope to get some projects posted soon to show you this amazing bundle in action!  

Happy Bundle Shopping!
Mary

Where did the time go....


Oh my!  I have not posted anything here in weeks!  I've got projects sitting on my desk that need to be posted and Agility updates too!  There just hasn't been enough free time to do it!  Midge was sick and we've been to see our Vet so many times that yesterday, she just shook her head and laughed when se opened the door to the exam room!  I'm just resigned to handing over the credit card now.  Today I should get some results in that will rule something out or give us an answer to certain questions.  Now she has something new going on that is a "wait and see" thing ... I don't like those - I'm a "take action" girl!  I want it done and over with - NOW!  But, sometimes, that just isn't going to happen :)

In the midst of all of the medical drama, we managed to compete this weekend, in Agility, in NY. 
It was cold, wet and miserable weather but we had a fun time playing the game we love while make new Agility friends.   I am looking forward to next Spring/Summer when we can re-visit NY and actually know some people out there :)

Until I can come back here and post some of my latest Cards and Crafts, I will leave you with this video from the weekend.  Hope you enjoy it! 


Thanks for stopping by today,
Mary

Thursday, September 13, 2012

BeJeweled Frightening Feline


Isn't She pretty?  This is the final card we made at Tami's club last week.  Very interesting technique used here!  

We stamped the cat on Vellum and, once she was dry, we flipped the vellum over and colored the kitty with Tangerine Tango on the back side!  How cool is that?!  I thought it was super cool!  

The image panel is actually three layers, all cut with the New Window Frames Collection Framelit Dies - on page 30 of the New Holdiday Catalog.    The bottom layer is Very Vanilla Card Stock, the middle layer is the WhiteVellum Card Stock with image, and the top layer is Basic Black Card Stock cut as a border by using two different sizes nested together.  The Designer Paper is from the awesome Howlstooth and Scaringbone pack - on page 24 of the Holiday Catalog.  I love this paper!  The Happy Halloween, from Teeny Tiny Wishes - page 133 of the main Catalog,  is stamped in Basic Black and punched out with the Word Window Punch and adhered to the card with Snail Adhesive.  Our image panel is adhered to the card with Dimensionals.  As a finishing touch, we used Rhinestone Basic Jewels - page 175 of the main catalog - for her shimmering eyes!  This was a super fun card to make!

Hope you enjoyed today's project!
Have a fun day and Thanks for Stopping By today!
Mary

Wednesday, September 12, 2012

Toxic Treats with that "WOW" Factor


Here is another card we made at Club last week.  This photo simply does not do justice to the impact this card has!  It is stunning!  We used a Basic Black card base to build our card on.  A panel of Pink Pirouette Card Stock was run through the Big Shot with the Argyle Impressions Folder then sponged with Rich Razzleberry Classic Ink followed by Basic Black Classic Ink.   We cut  layers of Silver Glimmer paper and Basic Black Card Stock using the Big Shot and Labels Collection Framelit Dies.   The image from the Toxic Treats Stamp Set was stamped with Basic Black Ink and cut using the coordinating die from the same Labels Collection Framelits Dies.  We then sponged the image panel with the Rich Razzleberry and Basic Black Inks in the same manner as we did for the main panel.   I used Snail Adhesive to adhere my image to the black piece and Crystal Effects to adhere the black panel to the Glimmer Paper.  The Glimmer Paper requires a very strong adhesive to adhere to it so I chose to use my Crystal Effects -  it worked perfectly!  The Glimmer paper layers are attached to the main panel using Dimensionals.   You really should give this card a go!  It is simply stunning!!!  All of the products used to make this card are available in my Online Store - just click the link to the right.  And, don't forget, during the Month of September, you may choose a spool of our fabulous 3/8" Stitched Satin Ribbon for FREE with every $40 in product you buy!!!  Simply enter your selection at Check-Out!!!

Thanks for stopping by today!  
I hope you enjoyed todays card and it inspires you to get inky!
Mary


Tuesday, September 11, 2012

Distressed Wonderfall


When I walked into my Upline's (Tami White) house for club, this was the first project I saw and I got super excited! As I have said, I LOVE leaves!  I saved it for last too :)  

We used a Soft Suede card base and ran a piece of the new Core'Dinations Card Stock through the Big Shot with the new Woodgrain Embossing Folder (love it!) then sanded with the Stampin' Sanding System.  Next we took our Auntumn Accents Bigz Die to cut leaves and the acorn (another "love it"!), folded the leaves in half and ran them through the Big Shot using the Woodgrain folder again.  This really makes them look more realistic!  We then sponged the edges of the leaves with Early Espresso Ink.  The crown of the Acorn was embossed using the Square Lattice Embossing Folder and running it through the Big Shot.  The Sentiment from Day of Gratitude was stamped in Early Espresso and punched with the Extra-Large Oval Punch then sponged with Early Espresso.  The Leaves and Acorn are popped up with Dimensionals for a layered affect.   

I can't wait to make more of these cards!

Thanks for visiting today,
Mary

Back from the weekend....


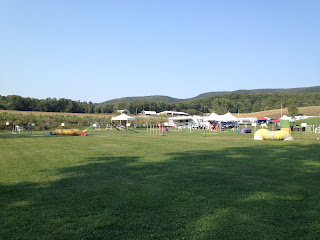
We had a fantastic weekend at Sugarbush Farm in NY playing Agility games and making new friends. Midge and I continue to work on Contacts and I chose to forget the elusive Lead-Out and just run with her from the start-line.  Luckily, the courses this weekend allowed for it!  We earned one more Standard "Q" towards our C-ATCH - only two more to go!  I am so lucky to be able to play the game that I love with my baby girl!  We will be planning many more trips to Sugarbush Farm in the future!  What a truly fabulous place to stay and play!  

Wednesday, September 5, 2012

a CASE for Lacy and Lovely


As I mentioned yesterday, here are the CASE cards I made using the same colors as the original creator: Tempting Turquoise, Baja Breeze and Island Indigo.  The original card can be seen Here.


The Thank You card contains Very Vanilla 3/8" Taffeta Ribbon in place of the Seam Binding ribbon and on the Miss You card, I swapped the Very Vanilla Seam Binding Ribbon for Baja Breeze Seam Binding Ribbon.  I like them both!  


I opted to leave out the jewelry tag on the Miss You card.  I can always add one later.   


Here are the three cards together.  Each one is slightly different from the others.  I love them all!  I can't wait to try different color combinations!  

Thanks for stopping by today!   
Mary


Tuesday, September 4, 2012

Lacy and Lovely with Midnight Muse Stitched Satin Ribbon


I said it before and I'll say it again... I love this ribbon!  It is so Soft!
I ordered the Stampin' Up stamp set Lacy and Lovely for the Sentiments.  I loved the font and really wanted the "Hello" most of all.  I wasn't crazy about the elements that came with it.  They don't really speak to my style.  But, once I caught a glimpse of a card posted by Picard76 on Splitcoaststampers, I changed my mind!  I recreated her card - I will post those tomorrow - but decided to mix things up a bit here.  I changed the colors to some of our new In-Colors:  Gumball Green, Summer Starfruit and Midnight Muse.  I just love how it came out!  A whole spool of this ribbon can be yours - FREE - with a $40 order placed in my online store!  Just click the link in the right hand side bar.   This incredible ribbon is available in all 5 of our new In-Colors.  Collect all 5 - for FREE - with a $200 order.  Or, pick your favorites!  One free Spool/$40 you spend!  And don't forget to stop by the Clearance rack - there are a lot of fantastic buys - including Halloween Designer Papers and a Bat Punch - Halloween is right around the corner after all!

I'll be back tomorrow with the other 2 cards I created using the original creator's color scheme!
Thanks for stopping by! 
Mary

Monday, September 3, 2012

It's Back to Spool Time with Stampin' Up!

Stampin' Up's Back to Spool Time Promotion

Wow!  Is this an incredible offer or what?!
For every $40 purchase you earn one free spool of the awesome new In-Color 3/8 inch Stitched Satin Ribbon!  This is fabulous ribbon!  So soft and and gorgeous!  It is stitched right through the ribbon so both sides look equally amazing!  What's even better is that you choose the colors you want at check-out.  This is so exciting!  I'll be in the "Spend $200 and earn one spool of each of the 5 colors" Club for sure!  Just click Here for the details and enter my online store to place your order.  This offer is available the whole month of September so shop as often as you wish!  
I'll be posting a new project highlighting this ribbon in tomorrow's post!  


 Isn't it great when you earn free ribbon!?  You bet it is!
If you need any assistance placing your order, let me know.   I'm happy to help!
Thanks for stopping by today,
Mary 


Let the recovery begin...


3 days of CPE Agility Competition came to a close yesterday afternoon.  We absolutely loved competing at Sugarbush Farm in NY.  What a fabulous place they have there!  A true slice of heaven!


Midge and I ran 12 runs over the three days.  It was a really warm weekend, especially in the sun.  We were grateful for the gorgeous fenced-in pond and leash-free running grounds for cooling off and hanging out with new friends.


We Qualified in 10 out of the 12 runs... Midge's start-line stay became an issue again... something we will be focusing on from now on.  We did see a marked improvement in her trial contacts - something I need to be more consistent about enforcing.  The courses were super fun and I was so proud of our team when we met both Jackpot gambles with success!!!  I wish Roger had gotten yesterdays Gamble on video - I would love to watch it and see what I managed to do right :)  


After the last run of the day, Midge said "I'm done!".  She jumped into car in the truck and crashed!  It was over 2 hours before we were packed up and ready to drive home and she didn't come out until we were home and it was time to go in the house!  My poor baby was completely toast!  So, 3 Standard Q's down and 5 to go for our Championship Title!  I can't believe it!  5 more days and we'll be running again - back at Sugarbush Farm next weekend!  Can't wait!

Thanks for stopping by and we hope you are enjoying this wonderful Labor Day Weekend!
Mary


Thursday, August 30, 2012

Down Came a Spider...


... to wish you a Happy Halloween!

I whipped up this cute and quick Halloween card with my new Googly Gouls and Wacky Wishes stamp sets.  I had the panel from the Howlstooth and Scarybone designer paper and the scallop edge strip leftover from my Frightening Feline card I posted earlier.  I simply added a narrow border of Tangerine Tango at the top to finish it off.  Next, I stamped the Happy Halloween from Wacky Wishes on Very Vanilla cardstock with Black Craft Ink and heat embossed it with Clear Embossing Powder.  I cut it down and mounted it on a black piece just slightly larger.  My spider from Googly Gouls was stamped in the Black Craft Ink and heat embossed in Clear Embossing Powder as well.  I love this little spider!  He's so cute!  I punched him out with my 1 1/4" Circle Punch and mounted him on a Tangerine Tango circle punched with my 1 3/8" Circle Punch.  Both the greeting panel and my spider are adhered to the front panel with Dimensionals.   I love it!  

Have a Great Day and Thanks for stopping by,
Mary

Wednesday, August 29, 2012

Box Gone Bad


What do I do when a fabulous project goes terribly wrong?  Hide it :)
I received a wonderful box tutorial from my Mentor & Upline and could not wait to make the project!  However, it went terribly wrong - right in the middle - and there was just no way I could throw that much cardstock and designer paper into the trash and start over!  I had to think of something to hide my mistake!  So, that panel on the front, it isn't supposed to be there :)  Overall, it looks pretty good.   I will try this project again and see if I can't get it right.  I don't think that anyone will know it wasn't intended to look this way.  That is one thing I love about paper crafting:  
There are no mistakes, only opportunities for creativity!
Have a fantastic day!
Mary

Tuesday, August 28, 2012

With Sympathy


I recently was in need of a masculine Sympathy card and was inspired by a card I found while searching through Splitcoaststampers.  I was fortunate to own the stamp set they used: the recently retired Uncharted Territory.  I lined up the two stamp images on my largest clear block and inked it up with Early Espresso.  I stamped it on to a piece of Very Vanilla Cardstock and ran the panel through the BigShot with my Square Lattice Embossing Folder.  I added that panel to a panel of Early Espresso Cardstock cut 1/4" larger and put them on a Very Vanilla Card.  I punched my With Sympathy out with my Modern Label Punch then added snips of Early Espresso, punched with the same punch, to the ends.